Technical #1 with Lottie Davies
For our very first practical lesson on the fundamentals of hair and postiche, Lottie got us to grips with 3 types of buns and plaits on our model head.
Modern Bun

 Lottie wanted us to create a 'modern' bun without using a hair doughnut to create the shape we wanted as the final result. To start with, I created a ponytail to gather all the hair together. On this particular head, I tied only half up to make it easier to practice. Then the ponytail needed to be seperated into 4 sections - top, left, right and bottom. As shown above I have gathered the top section and backcombed it slightly to make sure it keeps it shape when it is rolled in the next step. I then pinned it and repeated this technique 3 more times (the result is shown on the left). Using these 4 sections, we used fine waved pins to tease the backcombed areas and pull them across to meet the sections next to them. Once the gaps become closed between the sections, I secured them with the pin to keep the sections all together. The images below show my first attempt at the Modern Bun. I feel this was a successful first attempt as the bun has a nice rounded shape and the hair remains looking sleek and neat. However, unfortunately the hair on the model head is quite thin and therefore the bun is quite seethrough and not as thick as I would have desired.

 For this bun, we had to start with a ponytail again and simply twist the hair and tie it around the hair tie. This created a rough bun on the top of the head. To neaten the look, I pulled bits of hair towards the scalp with a hair pin. This meant the bun looked fuller and less roughly put together. With this particular style I feel it is very easy to put together and will be a useful skill to develop, an easy one to replicate and incorporate within other hair styles.


 To begin learning about the various types of plaits, we began by practising and demonstrating the basic plait. French Plait Lottie then taught us how to perfect a French plait. Fishtail Plait
 I wanted to try and attempt the variations of the plait using all the models hair. My first attempts are quite messy and I wasn't sure what were the best techniques to aid creating a polished French Plait and Fishtail Plait. The image on the left demonstrates my attempt in the classroom. Afterwards, Lottie advised me with the French Plait to include parts of the hair from the middle and then the outside of the head to make sure the tension is high and there will be no gaps between each section of hair. Below our my 2nd attempts of plaiting the whole head and I feel these are much more effective and professional following Lottie's advise.

For our very first practical lesson on the fundamentals of hair and postiche, Lottie got us to grips with 3 types of buns and plaits on our model head.
Modern Bun

 Lottie wanted us to create a 'modern' bun without using a hair doughnut to create the shape we wanted as the final result. To start with, I created a ponytail to gather all the hair together. On this particular head, I tied only half up to make it easier to practice. Then the ponytail needed to be seperated into 4 sections - top, left, right and bottom. As shown above I have gathered the top section and backcombed it slightly to make sure it keeps it shape when it is rolled in the next step. I then pinned it and repeated this technique 3 more times (the result is shown on the left). Using these 4 sections, we used fine waved pins to tease the backcombed areas and pull them across to meet the sections next to them. Once the gaps become closed between the sections, I secured them with the pin to keep the sections all together. The images below show my first attempt at the Modern Bun. I feel this was a successful first attempt as the bun has a nice rounded shape and the hair remains looking sleek and neat. However, unfortunately the hair on the model head is quite thin and therefore the bun is quite seethrough and not as thick as I would have desired.
Wrap Around Bun
 For this bun, we had to start with a ponytail again and simply twist the hair and tie it around the hair tie. This created a rough bun on the top of the head. To neaten the look, I pulled bits of hair towards the scalp with a hair pin. This meant the bun looked fuller and less roughly put together. With this particular style I feel it is very easy to put together and will be a useful skill to develop, an easy one to replicate and incorporate within other hair styles.
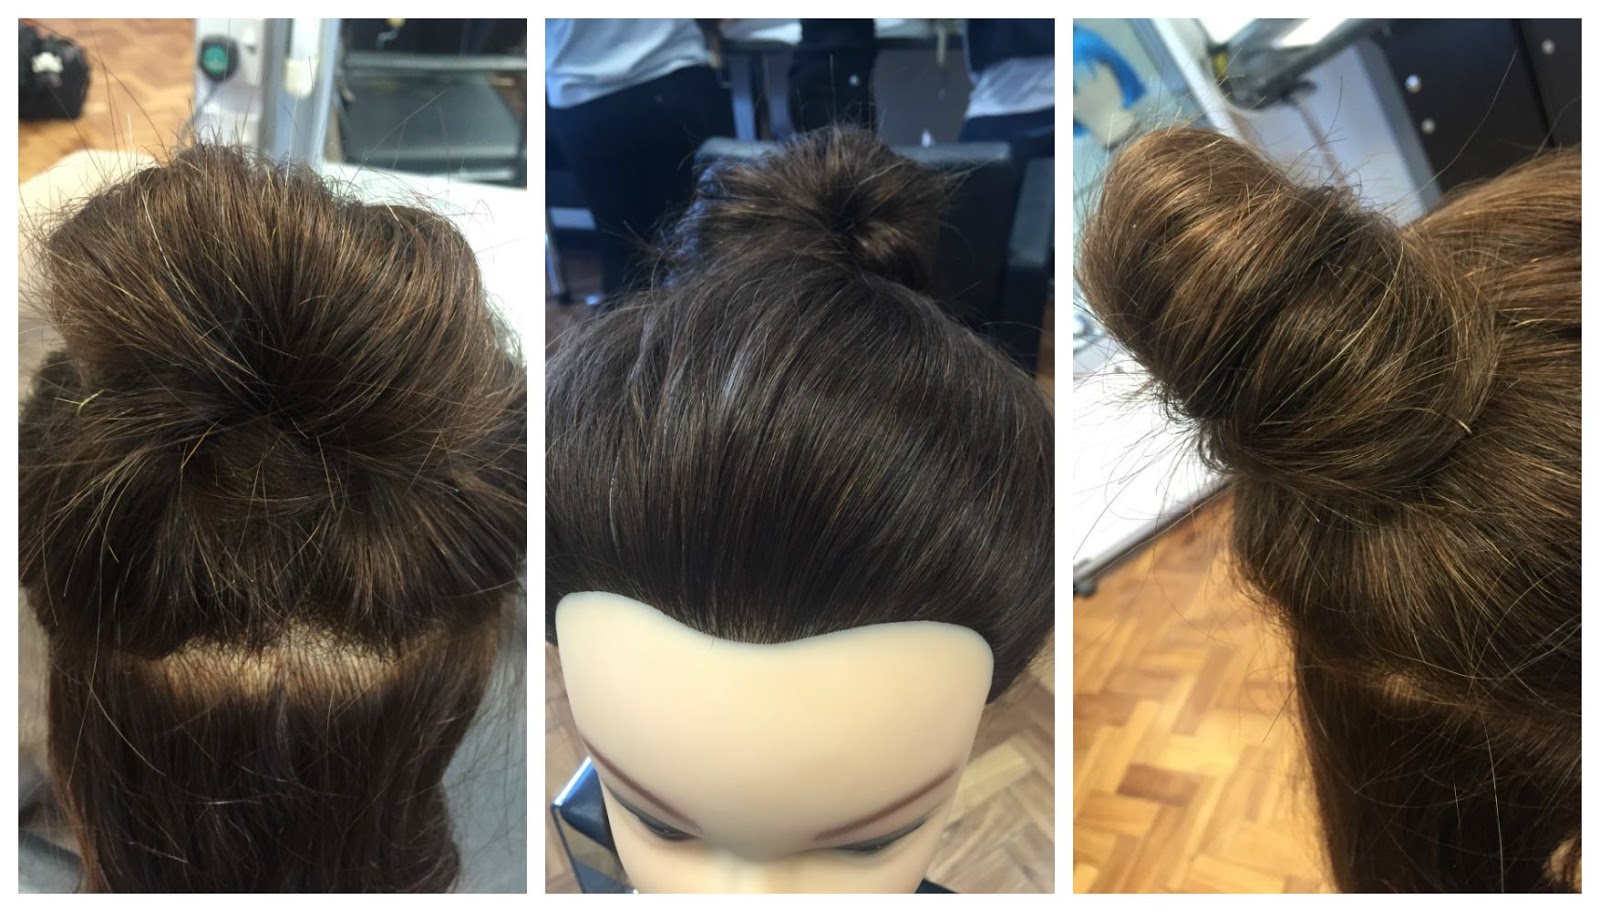
Plaited Bun
Again with this bun I started with a ponytail but this time I used it to create a simple 3 strand plait. Then twisted this plait around, much like the wrap around bun, to get the desired look. I found it difficult with this model to make a long enough plait to make the bun big enough and look effective. My final result was quite messy and I think on longer and thicker hair it would have a better outcome.

Plait

 To begin learning about the various types of plaits, we began by practising and demonstrating the basic plait. French Plait Lottie then taught us how to perfect a French plait. Fishtail Plait
The final plait that was taught to us in this lesson was a fishtail plait. I have taught myself this before but Lottie advised that the best way was to use small section from each side to make it the most effective. Also, to not make the tension too high or you will not be able to loosen the plait to make it messier and softer.
 I wanted to try and attempt the variations of the plait using all the models hair. My first attempts are quite messy and I wasn't sure what were the best techniques to aid creating a polished French Plait and Fishtail Plait. The image on the left demonstrates my attempt in the classroom. Afterwards, Lottie advised me with the French Plait to include parts of the hair from the middle and then the outside of the head to make sure the tension is high and there will be no gaps between each section of hair. Below our my 2nd attempts of plaiting the whole head and I feel these are much more effective and professional following Lottie's advise.